

Cake Pops (yellow and chocolate cake)

We’re back! Sorry for the long hiatus. We’ve been super busy with other things. We’ve been cooking, but not blogging what we’ve been cooking. I can say though, with certainty that we have some great blogs coming your way. We cooked some good stuff in the last 2 months and will try and get back on schedule to get you at least one of those recipes a week.
I rarely bake, and I rarely make sweets, but I recently needed to take a crack at making cake pops. I recall hearing about cake pops at some point, but it never clicked in my head to try and make them until Starbucks had them for sale. I’m not typically inspired by Starbucks or food I get from chain stores, but their pink birthday cake cake pop is very good. They released a line of cake pops in honor of their birthday recently and I’ve tried all of them. They have a rocky road, birthday cake, and tiramisu varieties. I decided I wanted to see if I could make some as good, or better. I spent a lot of time reading various blogs and studying different methods of making the cake filling and how to assemble them and so on. I think I mastered it in my first outing and I can’t wait to do it again with other types of cake and flavors.
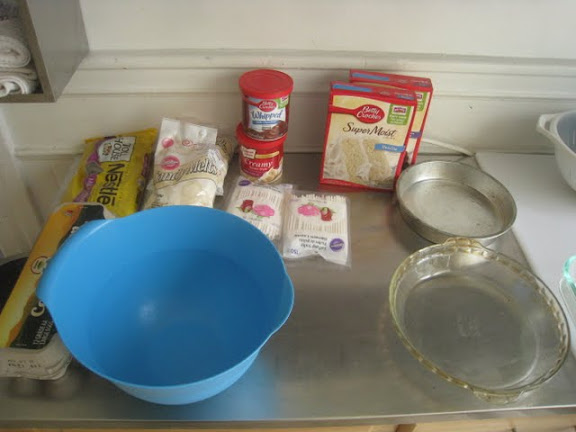
So, here we go… For this attempt, I used the most basic and not very sophisticated ingredients because I wanted to make it as simply as possible.
CHOCOLATE CAKE POPS INGREDIENTS:
- Box of typical chocolate cake mix(or one fancier, gluten free, etc)
- Ingredients called for from the cake mix box. (I used 2 egg whites to 1 egg that it called for)
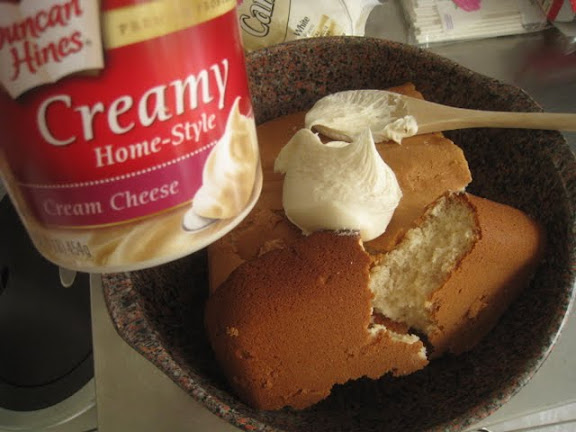
- 1/2 to 3/4 tub of chocolate frosting or frosting of your choice. I used Milk Chocolate Whipped frosting
- Paper candy sticks, or lollipop sticks (got mine from Michael’s)
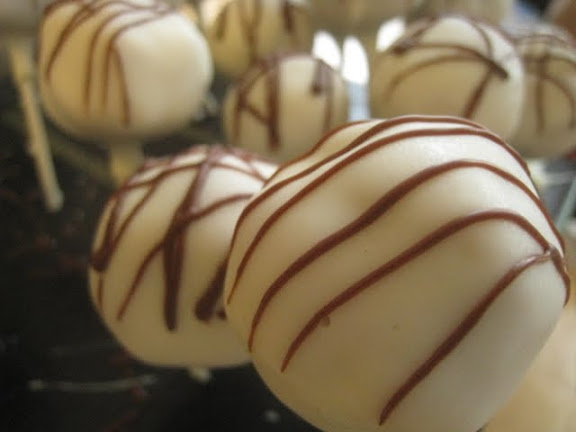
- 1 package of chocolate chips or chocolate candy melts (this is for the coating) I used both milk chocolate and white.
- Crisco or shortening (this is for thinning the chocolate coating)
- Vegetable spray for the pan
INSTRUCTIONS:
- Preheat the oven to the cake mix specifications.
- Follow the cake box directions to make the cake batter.
- Pour cake batter into a well oiled cake pan, or multiple cake pans, it doesn’t matter.
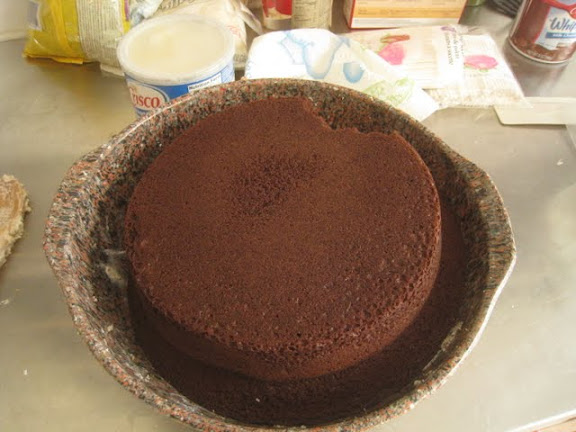
- Bake the cake, like the box says to and let the cake cool a bit.
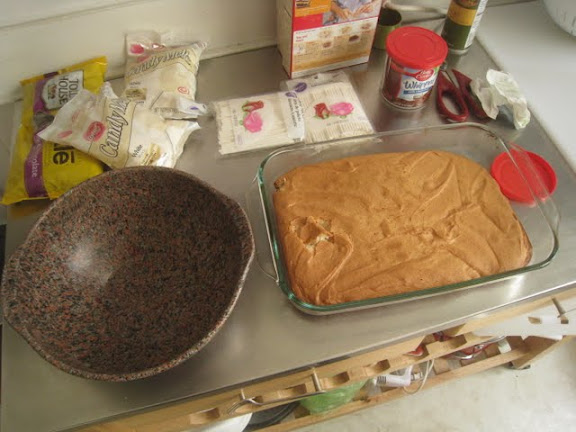
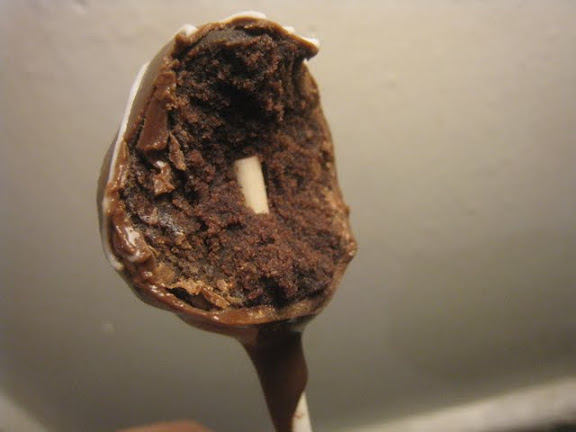
- Take the cake and crumble it into a big bowl.

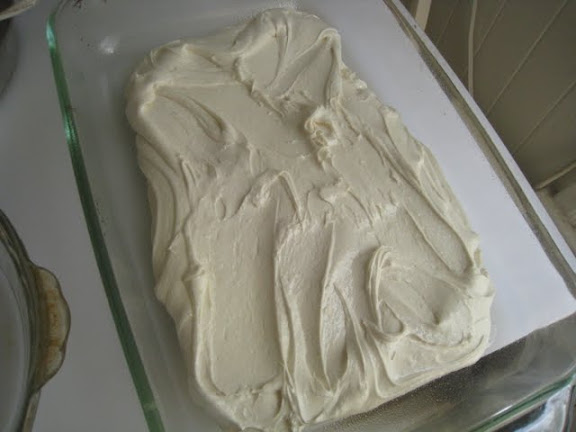
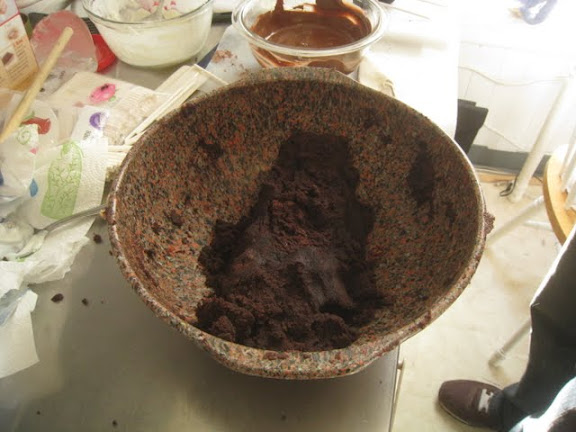
- Take the tub of frosting and scoop about half of the tub into the bowl with the cake chunks.
- Now you should use your clean hands and mix it all together. Plan on getting dirty hands.
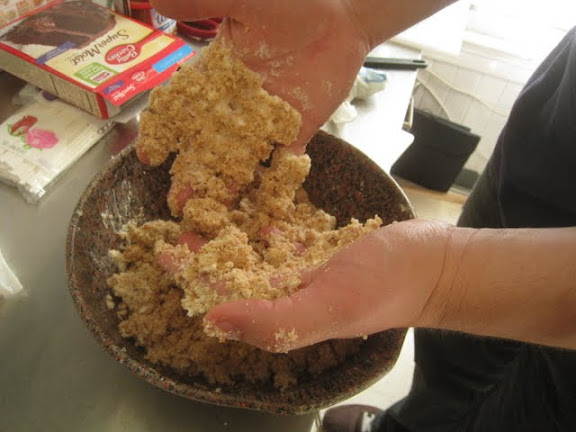
- Keep mixing the frosting and cake until it is good and moist and forms a ball that holds together well.
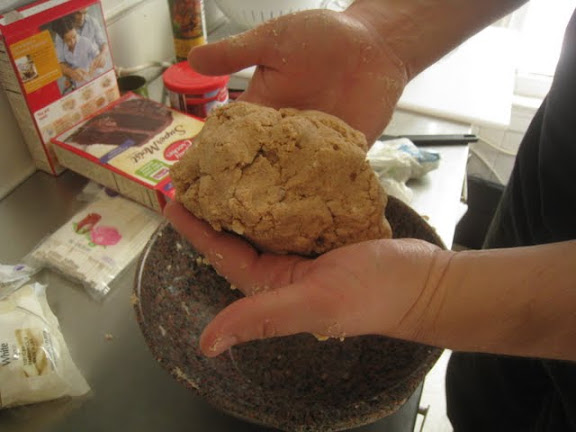
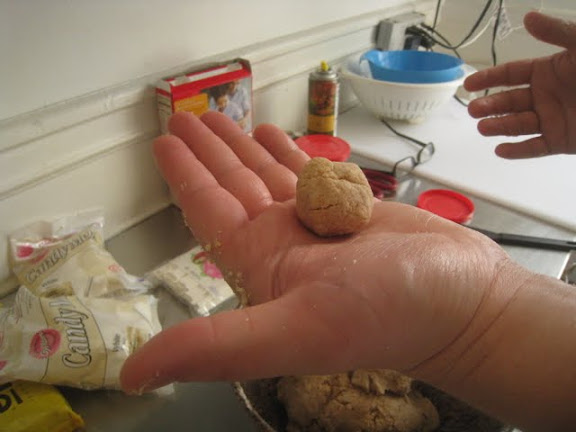
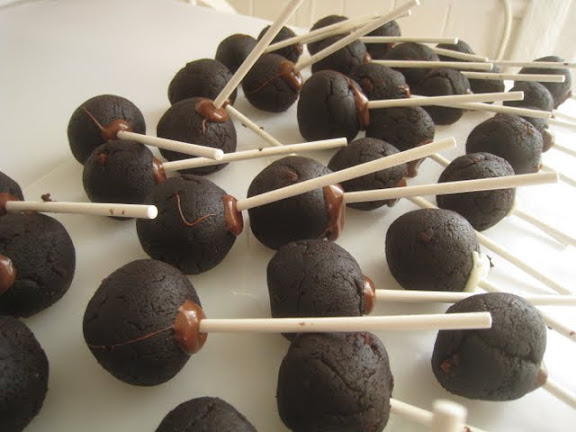
- Begin forming your cake pop balls by pulling out a chunk of dough and rolling them into 1.5″ balls and assemble them on a tray for later.
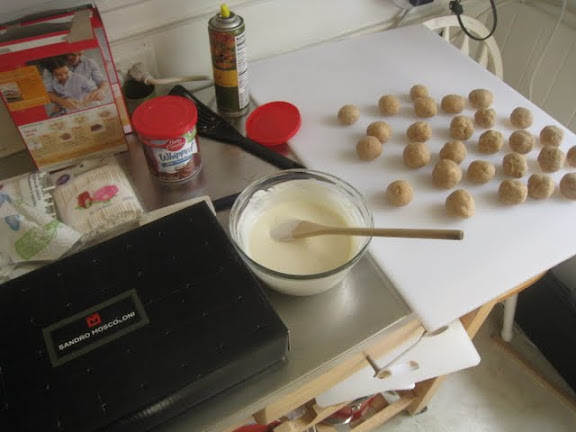
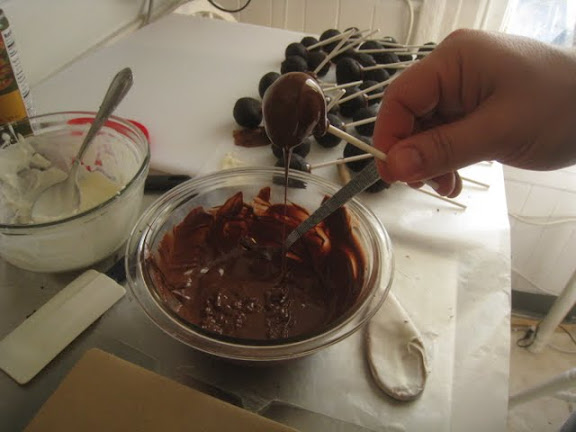
- After you roll the balls, begin making your chocolate coating by placing an entire bag of Candy Melts or chocolate chips in a microwave safe bowl and microwave on medium heat until melted. DO NOT BURN IT. Stir it a few times during heating, this will keep it heating evenly. To thin it out a little, I added some crisco. Not too much, but about a spoonful or two to the entire bowl helps the melted chocolate spread on the pops.
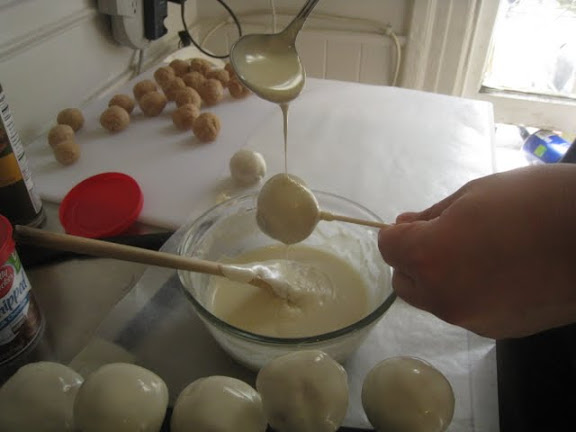
- With the melted chocolate go back over to your balls and begin assembling them.
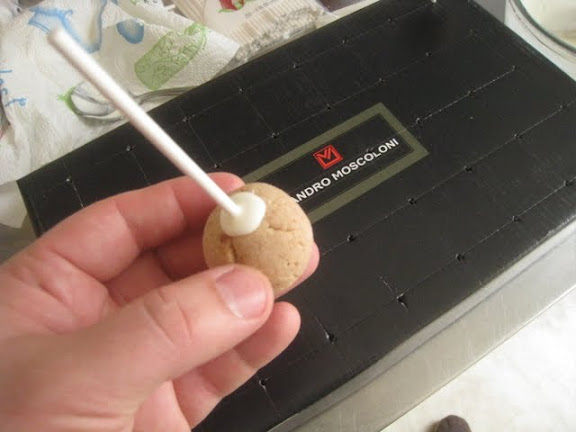
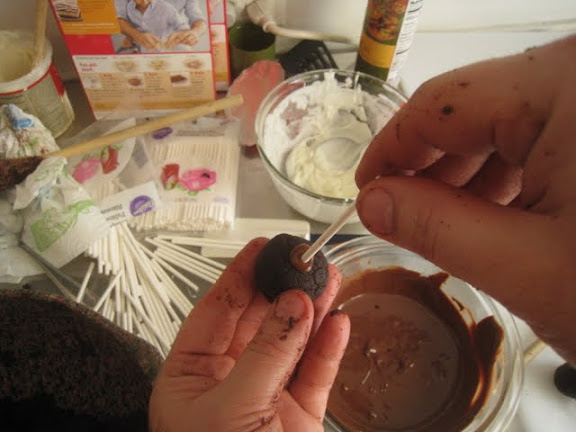
- Take a candy stick and dip the tip of it in the chocolate.

- Then poke the stick into one of your cake balls. It should go in about halfway into the ball, forming a slight nub of chocolate at the base of the stick and ball.
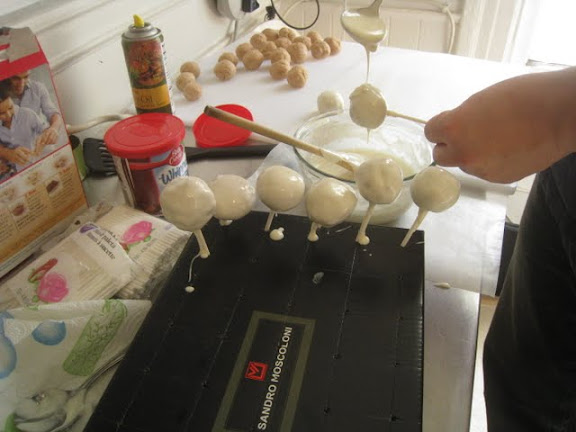
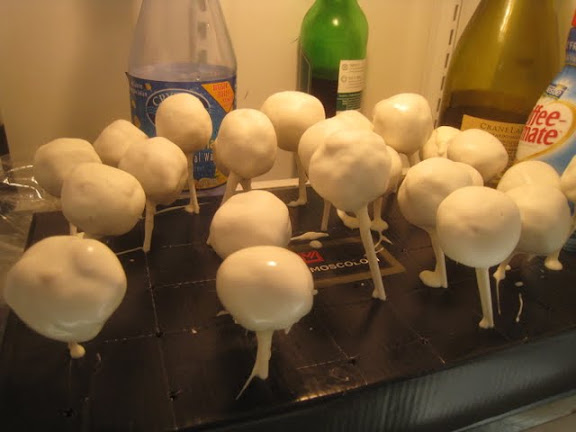
- Then, with a spoon, scoop and pour some melted chocolate over the cake pop and rotate the pop until you have good coverage over all of the cake dough. Some people suggest letting them dry at this point, but I went straight into covering them with chocolate and it worked fine. They didn’t fall out or spin when being coated. (They will spin if you try and dip them and spin them in the bowl of chocolate)
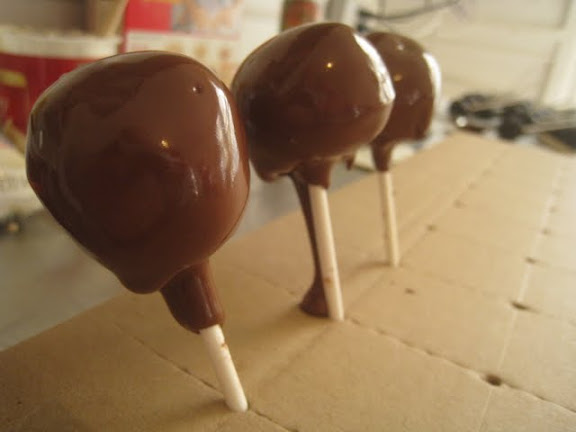
- Then you have to place your pops somewhere to harden and dry. I wound up making a pop holder out of the top of a shoe box.
- Repeat the process for all the rest of your cake balls and throw them in the fridge to harden them faster. They also taste better when cold.
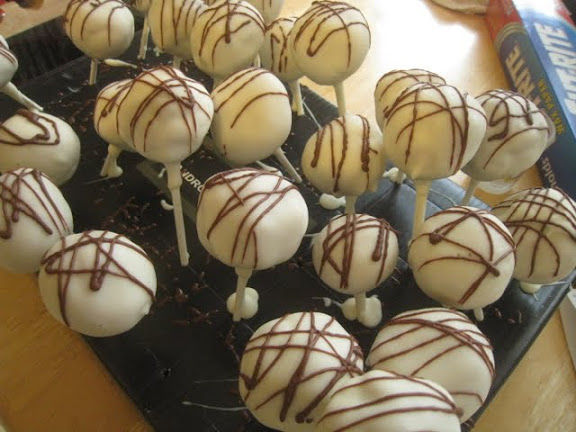
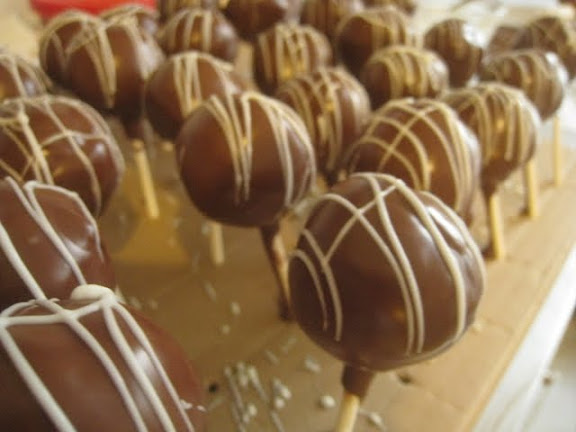
- I decorated them with a drizzle of the opposite color chocolate from the other cake pops.
Follow up thoughts…
On my yellow cake balls I left out the water, so they were super dry, but when I added extra frosting to the dough when mixing it up and making balls it seemed to cover it well. My chocolate cake balls were perfect.
My box top drying setup was pretty good, but I’d like to make something that lets them dry at an angle, so the drips will not go down the stick on my cake pops. So I may be trying to make some new type of holder.
Cake pops should fare well in ziploc baggies for handing out to friends, or you can get actual sucker wrappers and tie them on. Either way, I’m sure it’ll be good.
And here are pictures of the milk chocolate and chocolate cake pops:
POST CATEGORIES


